重排序 Colab 链接
https://colab.research.google.com/drive/1Af-udnqljZ-pDa714CO8PNHtnQeyTpl6?usp=sharing
分享我的Colab文件:
https://colab.research.google.com/drive/11jEpOECqYKEWh_75Bc3hSw2CmWqE4oF3?usp=sharing
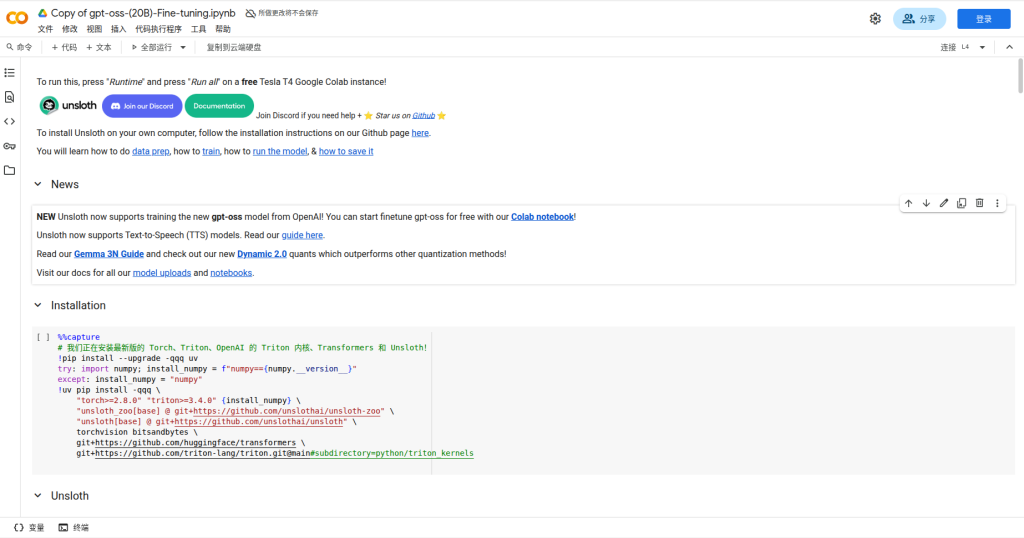
点开链接会进入Colab界面,在这所做的修改不会保存,需要将它复制保存到Drive中。

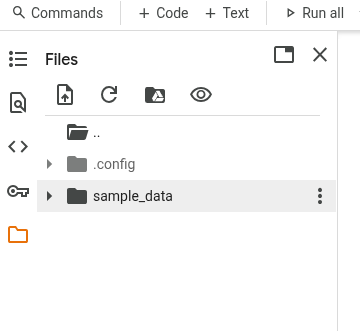
上传文件
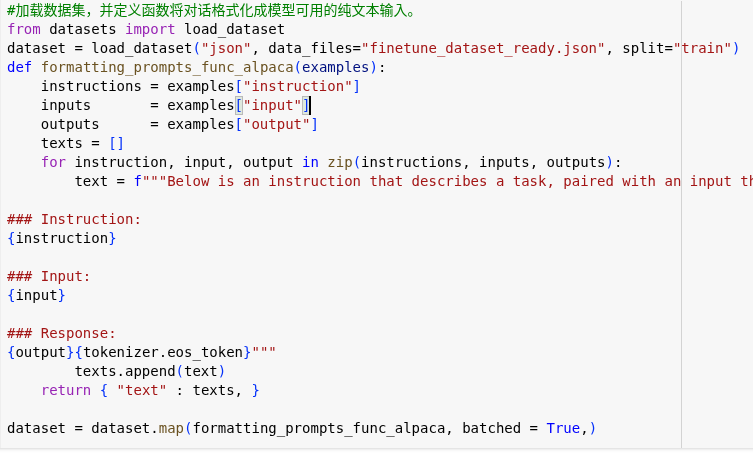
在这个单元格data_files=填入你的数据集名称;如果是别的数据集格式需要修改代码
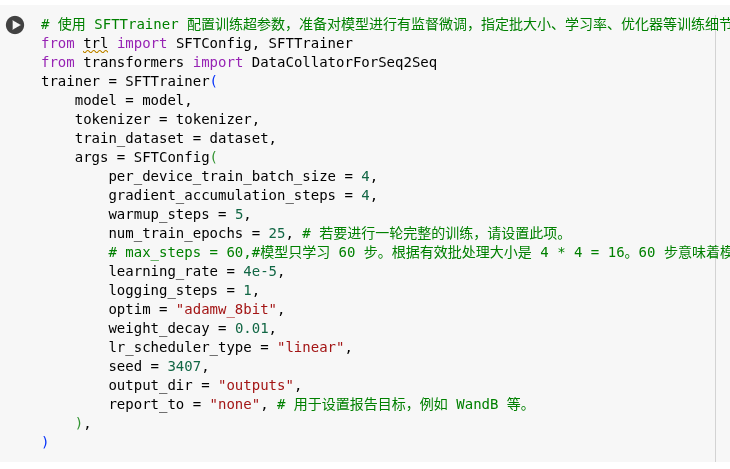
修改微调细节:
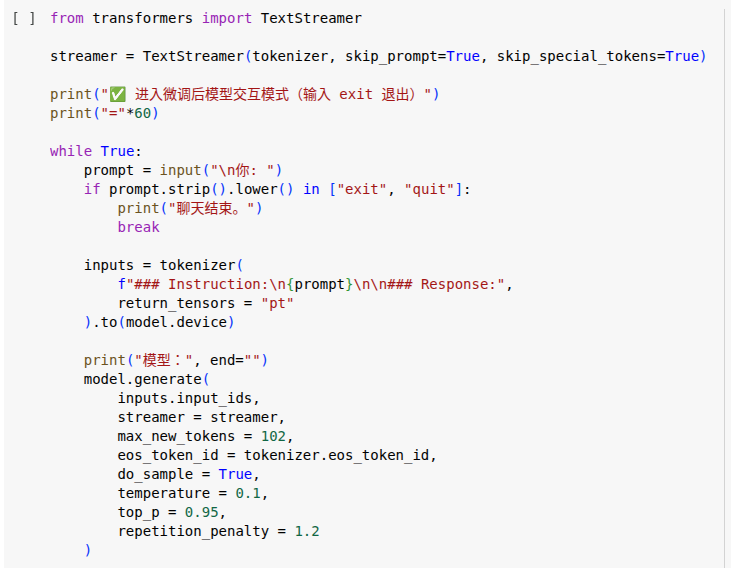
最后一个单元格是测试微调效果,在原项目上是没有的,如果不需要可以直接删除:
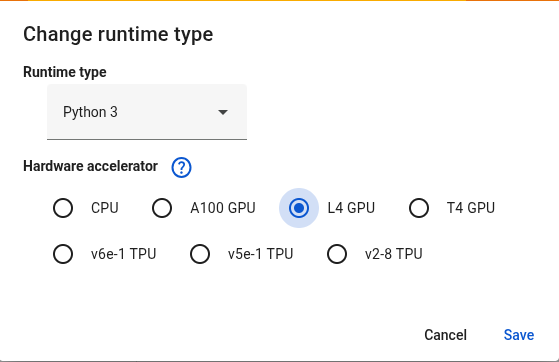
如果使用T4 GPU会有概率超出可使用显存,导致失败;推荐选择L4 GPU性价比最高;A100 GPU速度更快,收费更高,具体看你需求。
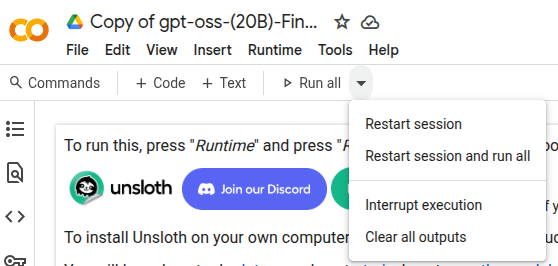
点击Restart session and run all即可一键运行:
创建虚拟环境: python -m venv tkg_agent_env
激活虚拟环境: source tkg_agent_env/bin/activate
克隆代码库 git clone https://github.com/openai/openai-cookbook.git
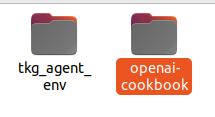
进入项目目录: cd openai-cookbook/examples/partners/temporal_agents_with_knowledge_graphs/
安装Jupyter Lab: pip install jupyterlab
启动Jupyter Lab服务: jupyter lab
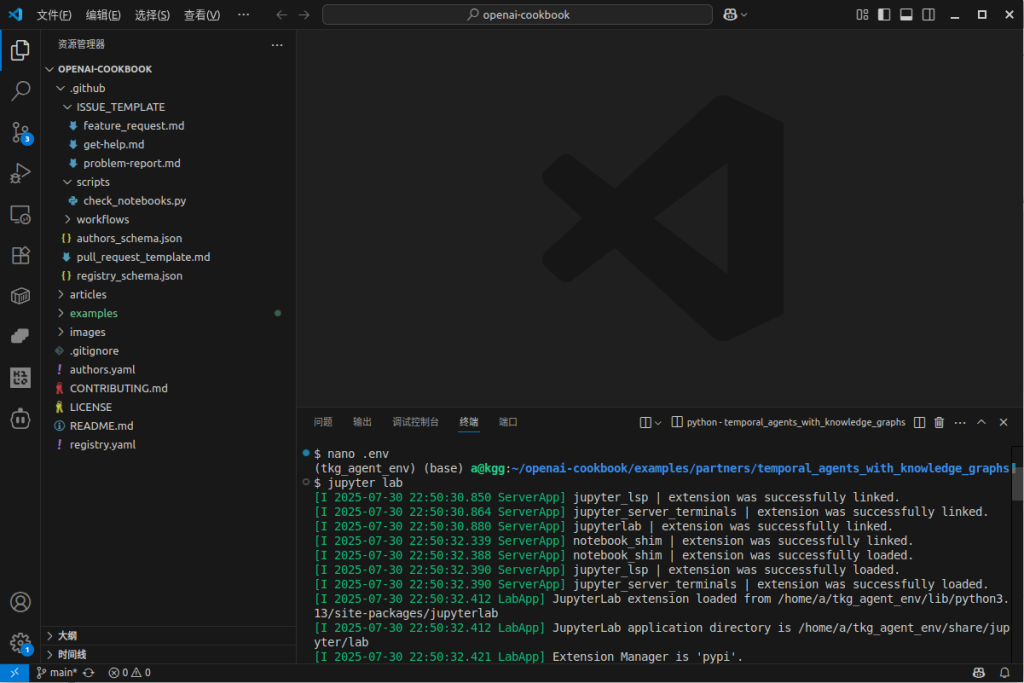
作用: 本地启动Web服务器,在浏览器打开Jupyter Lab操作界面,与项目文件进行交互。
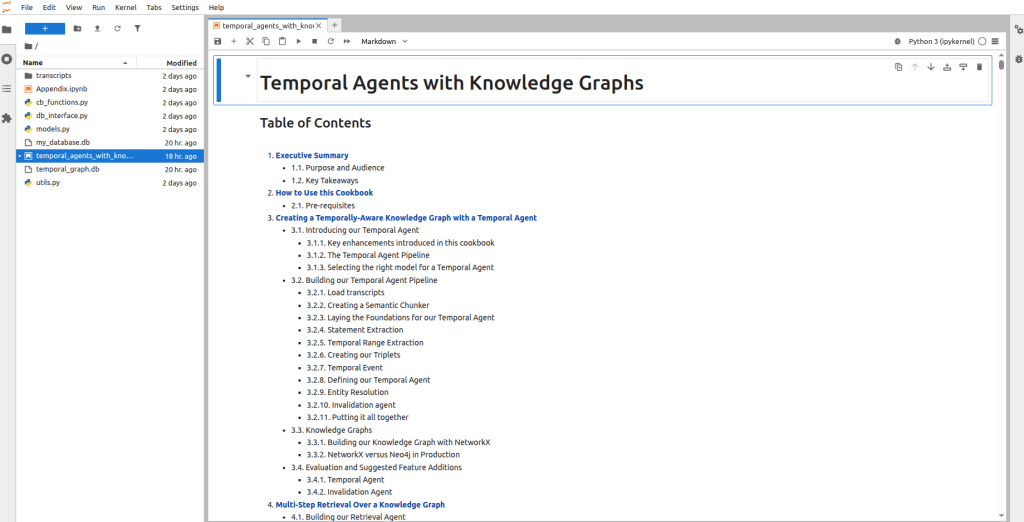
双击打开temporal_agents_with_konwledge_graphs.ipynb文件

点击“双箭头”图标,重启内核并一键运行所有单元格
等待输出结果
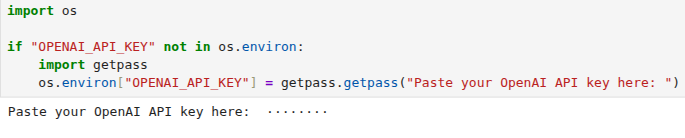
需要OpenAI的API key调用模型分块、问答
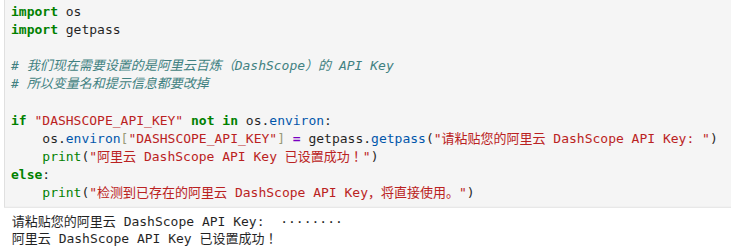
分块时如遇到API速率上限可选择更换模型,需自己手动添加
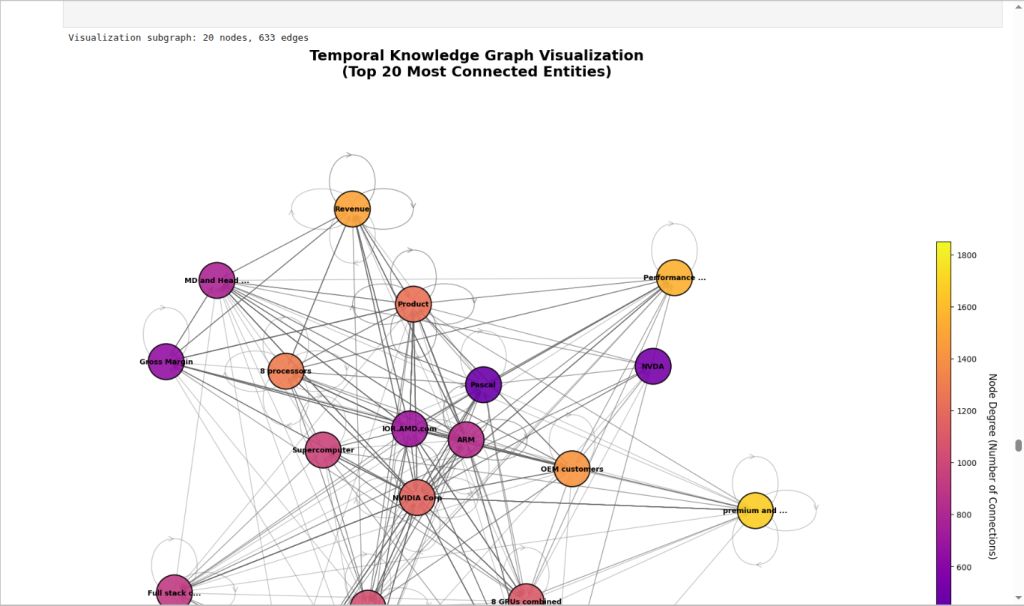
后续没有问题就会生成图谱
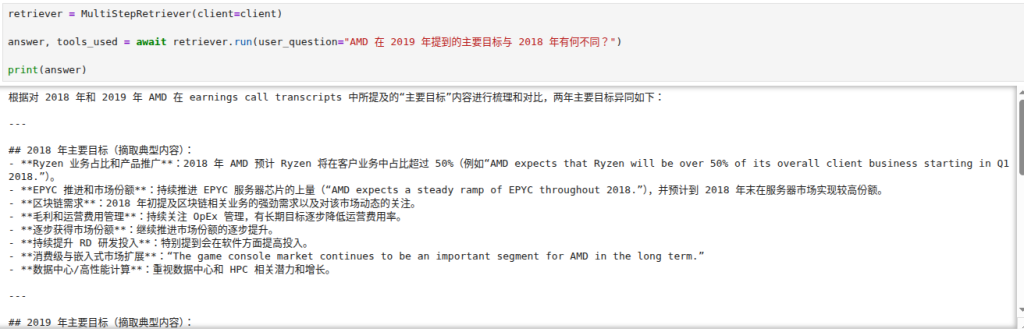
可在单元格修改问题测试问答
在作者Huggingface上也有上传的已经处理好的数据集,代码可以直接下载调用
关于过程步骤,整个文件有详细的英文说明。
数据是新时代的石油,但未经提炼的原油毫无价值。今天,几乎所有企业都坐拥海量数据,却发现自己被困在了一座巨大的“信息堆”中——数据彼此割裂,难以查询,无法形成有效的洞察力来指导决策。
如何才能让数据开口说话,甚至能听懂我们的问题并给出智慧的答案?答案是知识图谱。它能将杂乱的数据连接成一张智能网络,让每一次查询都成为一次深度洞察的开始。
DataGraphX 正是为此而生的利器。它不仅仅是一个工具,更是一套帮助企业从“信息堆”迈向“智能洞察”的完整方法论和技术引擎。接下来,我们将探讨DataGraphX如何赋能企业,将数据资产转化为真正的决策优势。
import requests
import time
import os

class PDFProcessor:
    def __init__(self, token):
        self.token = token
        self.headers = {
            'Authorization': f'Bearer {token}'
        }

    def upload_file(self, file_path):
        """上传本地文件到临时存储"""
        print(f"📤 正在上传文件: {os.path.basename(file_path)}")

        # 使用 tmpfiles.org
        try:
            with open(file_path, 'rb') as f:
                response = requests.post(
                    'https://tmpfiles.org/api/v1/upload',
                    files={'file': f}
                )
                if response.status_code == 200:
                    result = response.json()
                    # 获取直接下载链接
                    url = result['data']['url']
                    direct_url = url.replace('tmpfiles.org/', 'tmpfiles.org/dl/')
                    print(f"✅ 上传成功: {direct_url}")
                    return direct_url
        except Exception as e:
            print(f"❌ 上传失败: {e}")

        return None

    def process_pdf(self, file_path):
        """处理本地PDF文件"""
        # 1. 上传文件
        pdf_url = self.upload_file(file_path)
        if not pdf_url:
            return None

        # 2. 创建MinerU任务
        print("📄 创建解析任务...")
        task_url = 'https://mineru.net/api/v4/extract/task'
        headers = {
            'Content-Type': 'application/json',
            'Authorization': f'Bearer {self.token}'
        }
        data = {
            'url': pdf_url,
            'is_ocr': True,
            'enable_formula': True,
            'enable_table': True,
            'language': 'auto'  # 中文文档
        }

        response = requests.post(task_url, headers=headers, json=data)
        result = response.json()

        if result['code'] != 0:
            print(f"❌ 创建任务失败: {result['msg']}")
            return None

        task_id = result['data']['task_id']
        print(f"✅ 任务ID: {task_id}")

        # 3. 等待处理完成
        print("⏳ 等待处理...")
        while True:
            time.sleep(5)
            status_url = f'https://mineru.net/api/v4/extract/task/{task_id}'
            status_response = requests.get(status_url, headers=headers)
            status_data = status_response.json()

            state = status_data['data']['state']

            if state == 'done':
                zip_url = status_data['data']['full_zip_url']
                print(f"✅ 处理完成!")
                print(f"📦 下载地址: {zip_url}")

                # 下载结果
                self.download_result(zip_url, task_id)
                return status_data

            elif state == 'failed':
                print(f"❌ 处理失败: {status_data['data']['err_msg']}")
                return None

            elif state == 'running':
                progress = status_data['data'].get('extract_progress', {})
                extracted = progress.get('extracted_pages', 0)
                total = progress.get('total_pages', 0)
                print(f"⏳ 正在处理... {extracted}/{total} 页")

            else:
                print(f"📊 状态: {state}")

    def download_result(self, zip_url, task_id):
        """下载结果文件"""
        save_path = f"mineru_result_{task_id}.zip"

        try:
            response = requests.get(zip_url, stream=True)
            with open(save_path, 'wb') as f:
                for chunk in response.iter_content(chunk_size=8192):
                    f.write(chunk)
            print(f"✅ 结果已保存到: {save_path}")
        except Exception as e:
            print(f"❌ 下载失败: {e}")

# 使用您的Token和文件
TOKEN = "eyJ0eXBlIjoiSldUIiwiYWxnIjoiSFM1MTIifQ.eyJqdGkiOiIyOTkwMzQ1NiIsInJvbCI6IlJPTEVfUkVHSVNURVIiLCJpc3MiOiJPcGVuWExhYiIsImlhdCI6MTc1MTM3NDYyOCwiY2xpZW50SWQiOiJsa3pkeDU3bnZ5MjJqa3BxOXgydyIsInBob25lIjoiMTg5NTIxNTUyNTAiLCJvcGVuSWQiOm51bGwsInV1aWQiOiI1YTA0YmUxMC1kMTJkLTQ3NzktYjYyYi1mM2U4NTRmZWI0YTQiLCJlbWFpbCI6IiIsImV4cCI6MTc1MjU4NDIyOH0.kKzBBW2Jp2sVh3HXRVRlz-Df8WMHcDB7PM1pZbrmn3_QEt39bw3OrNAf8OkrmgY9Kign1fpTxPRzxopOenqO7Q"

# 处理您的PDF文件
processor = PDFProcessor(TOKEN)
local_pdf = "/home/wang/1_time/00bjfei/宁德时代宁德时代新能源科技股份有限公司2024年半年度报告174页(1).pdf"

# 检查文件是否存在
if os.path.exists(local_pdf):
    processor.process_pdf(local_pdf)
else:
    print(f"❌ 文件不存在: {local_pdf}")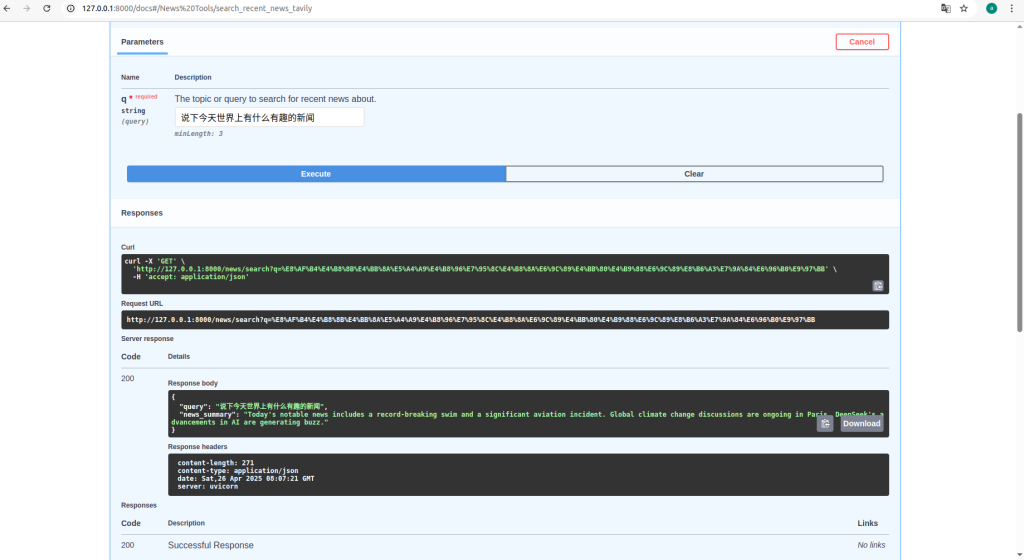
微信:adoresever
我的开源项目:
https://github.com/adoresever/DataGraphX_Learn
https://github.com/adoresever/Pretuning

代码
import os
import httpx
from fastapi import FastAPI, HTTPException, Query
from fastapi_mcp import FastApiMCP
from pydantic import BaseModel, Field
from dotenv import load_dotenv
import logging
import json

# --- 配置与设置 ---

load_dotenv()
API_KEY = os.getenv("TAVILY_API_KEY")
if not API_KEY:
    raise ValueError("在环境变量或 .env 文件中未找到 TAVILY_API_KEY")

logging.basicConfig(level=logging.INFO, format='%(asctime)s - %(name)s - %(levelname)s - %(message)s')
logger = logging.getLogger(__name__)

TAVILY_API_URL = "https://api.tavily.com/search"

# --- Pydantic 模型 (目前保持不变) ---

class NewsResponse(BaseModel):
    """描述 Tavily 搜索工具返回的新闻摘要。"""
    query: str = Field(..., description="用于搜索新闻的原始查询。")
    news_summary: str = Field(..., description="由 Tavily AI 基于查询找到的近期新闻的更详细摘要,合并了多个来源。")

# --- FastAPI 应用 ---

app = FastAPI(
    title="通过 MCP 使用 Tavily 搜索详细新闻", # 更新标题
    description="使用 Tavily AI 搜索查找并合并近期新闻细节,基于查询,并通过 MCP 暴露。",
    version="1.0.0",
)

# --- 新闻获取逻辑 (修改以获取更多细节) ---

async def fetch_detailed_news_from_tavily(news_query: str) -> str:
    """使用 Tavily AI 搜索新闻并合并结果以获取更多细节。"""
    payload = json.dumps({
        "api_key": API_KEY,
        "query": news_query,
        "search_depth": "advanced", # 使用高级搜索以获取可能更多的细节
        "include_answer": False,   # 如果你只想依赖结果内容,设为 False
        "max_results": 7          # 增加考虑的结果数量
        # "include_raw_content": True # 可选:可能获取更多原始内容,但需要仔细解析
    })
    headers = {'Content-Type': 'application/json'}

    async with httpx.AsyncClient(timeout=30.0) as client: # 为高级搜索增加超时时间
        response_data = None
        try:
            logger.info(f"正在向 Tavily AI 请求关于查询 '{news_query}' 的详细新闻摘要...")
            response = await client.post(TAVILY_API_URL, headers=headers, content=payload)
            response.raise_for_status()
            response_data = response.json()
            logger.debug(f"Tavily 对于查询 '{news_query}' 的原始响应: {response_data}")

            # --- 重点在于合并结果 ---
            combined_summary = ""
            if response_data.get("results"):
                summaries = []
                for i, res in enumerate(response_data["results"]):
                    title = res.get('title', f"来源 {i+1}")
                    content = res.get('content', '').strip() # 获取内容并去除首尾空格
                    # url = res.get('url', '#') # 如果需要,可以包含 URL
                    if content: # 仅当有内容时才包含
                        #清晰地格式化每个结果
                        summaries.append(f"--- 结果 {i+1}: {title} ---\n{content}")

                if summaries:
                    # 使用两个换行符连接所有摘要
                    combined_summary = "\n\n".join(summaries)
                    # 如果需要,可以限制总长度
                    # max_len = 2000 # 示例长度限制
                    # if len(combined_summary) > max_len:
                    #    combined_summary = combined_summary[:max_len] + "..."
                    logger.info(f"已合并来自 Tavily 对于查询 '{news_query}' 的 {len(summaries)} 条结果。")
                    return combined_summary
                else:
                    logger.warning(f"Tavily 对于查询 '{news_query}' 的结果没有可用的内容进行合并。")

            # 如果根本没有找到可用的结果
            logger.warning(f"Tavily 对于查询 '{news_query}' 没有返回可用的结果。")
            raise HTTPException(status_code=404, detail=f"无法使用 Tavily AI 找到与查询 '{news_query}' 匹配的近期新闻细节。")

        # --- 异常处理 (与天气示例大部分相同) ---
        except httpx.HTTPStatusError as exc:
            error_detail = "与 Tavily AI 服务通信时出错。"
            try: error_body = exc.response.json(); error_detail = error_body.get("error", error_detail)
            except ValueError: error_detail = exc.response.text or error_detail
            logger.error(f"从 Tavily 获取查询 '{news_query}' 的新闻时发生 HTTP 错误: {exc.response.status_code} - 详情: {error_detail}")
            if exc.response.status_code in [401, 403]: raise HTTPException(status_code=exc.response.status_code, detail=f"Tavily API 密钥错误: {error_detail}") from exc
            raise HTTPException(status_code=exc.response.status_code, detail=error_detail) from exc
        except httpx.RequestError as exc:
            logger.error(f"从 Tavily 获取查询 '{news_query}' 的新闻时发生网络错误: {exc}")
            raise HTTPException(status_code=503, detail="无法连接到 Tavily AI 服务。") from exc
        except ValueError as exc:
             logger.error(f"解码来自 Tavily 对查询 '{news_query}' 的 JSON 响应时出错: {exc}")
             raise HTTPException(status_code=500, detail="从 Tavily AI 服务收到无效的数据格式。") from exc
        except Exception as exc:
             logger.exception(f"获取查询 '{news_query}' 的 Tavily 新闻时发生意外错误: {exc}")
             raise HTTPException(status_code=500, detail="获取新闻摘要时发生意外的内部错误。") from exc

# --- FastAPI 端点 (调用新的获取函数) ---

@app.get(
    "/news/search",
    response_model=NewsResponse,
    operation_id="search_detailed_recent_news_tavily", # 更新 operation_id
    summary="搜索详细近期新闻 (通过 Tavily AI)", # 更新摘要
    tags=["News Tools", "Tavily AI"]
)
async def search_news(
    q: str = Query(..., min_length=3, description="用于搜索近期新闻的主题或查询。")
):
    """
    使用 Tavily AI 的高级搜索查找并合并来自近期新闻的细节,基于用户查询。
    返回一个合并了多个来源的更长的文本摘要。
    """
    logger.info(f"收到关于查询的详细新闻搜索请求: {q}")
    # 调用修改后的获取函数
    news_summary_text = await fetch_detailed_news_from_tavily(q)

    response_data = NewsResponse(
        query=q,
        news_summary=news_summary_text
    )
    logger.info(f"已通过 Tavily 成功检索到查询 '{q}' 的详细新闻摘要。")
    return response_data

# --- FastAPI-MCP 集成 ---

logger.info("正在初始化 FastAPI-MCP...")
mcp = FastApiMCP(app)
mcp.mount()
logger.info("FastAPI-MCP 服务器已挂载到 /mcp")

# --- 运行服务器 ---

if __name__ == "__main__":
    import uvicorn
    logger.info("正在启动用于 Tavily 详细新闻的 Uvicorn 服务器...")
    uvicorn.run(
        "news_mcp:app", # 确保文件名匹配
        host="127.0.0.1",
        port=8000, # 如果天气服务也在运行,可以更改端口,例如 8001
        reload=True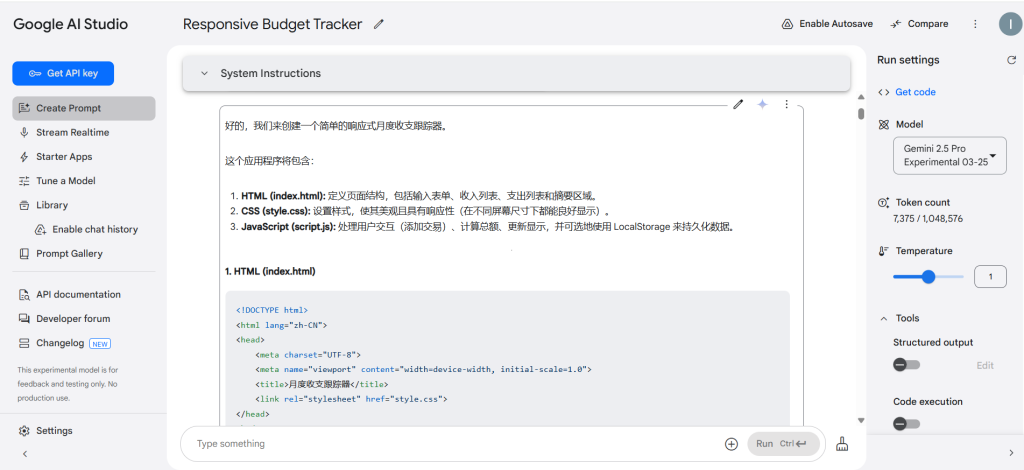
)测试的环境:Goodle AI Studio
测试的模型:选择Gemini 2.5 Pro Experimental 03-25
测试形式:通过向模型发送指令(prompt)
将此模型输出的三个文件放入Vs Code,注意三个文件要在同一个文件下。
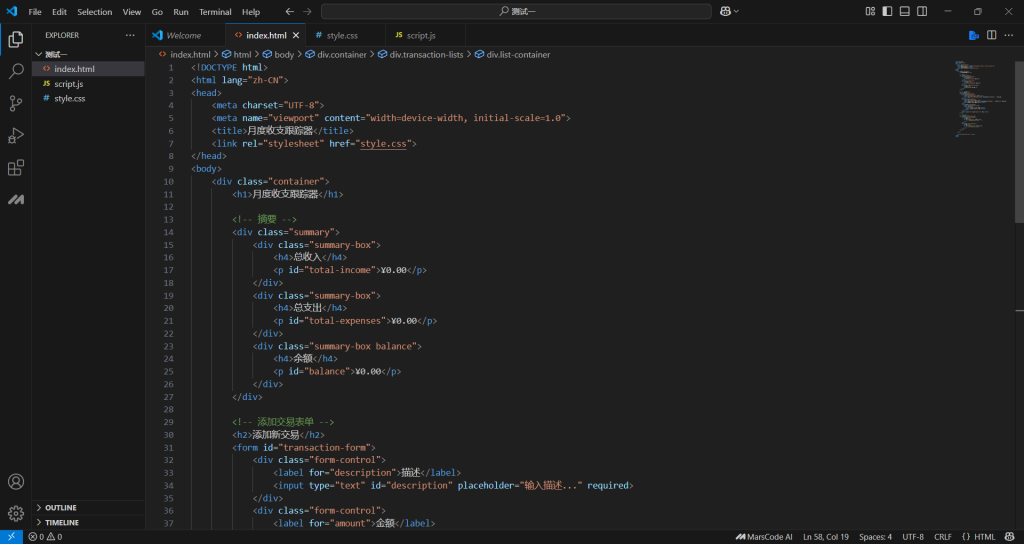
完成后我们打开HTML文件可以看到


操作结果:操作通过。用户可以自由添加支出收入金额,添加相应描述,同时系统会统计总支出,总收入和余额。
康威生命游戏是什么:
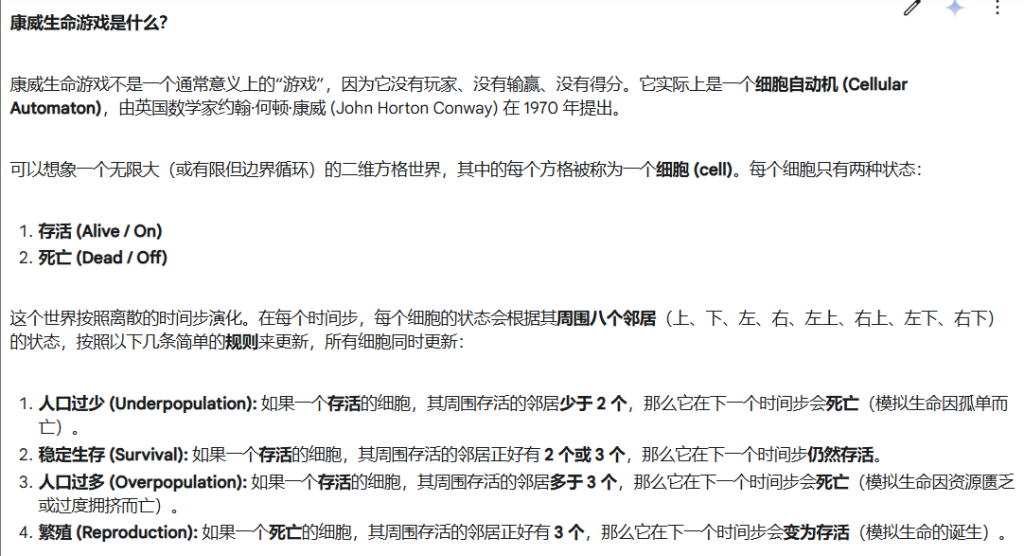
操作过程:向模型发出指令,但这次我们选择在python脚本中运行。
操作结果:测试通过,生成康威生命游戏
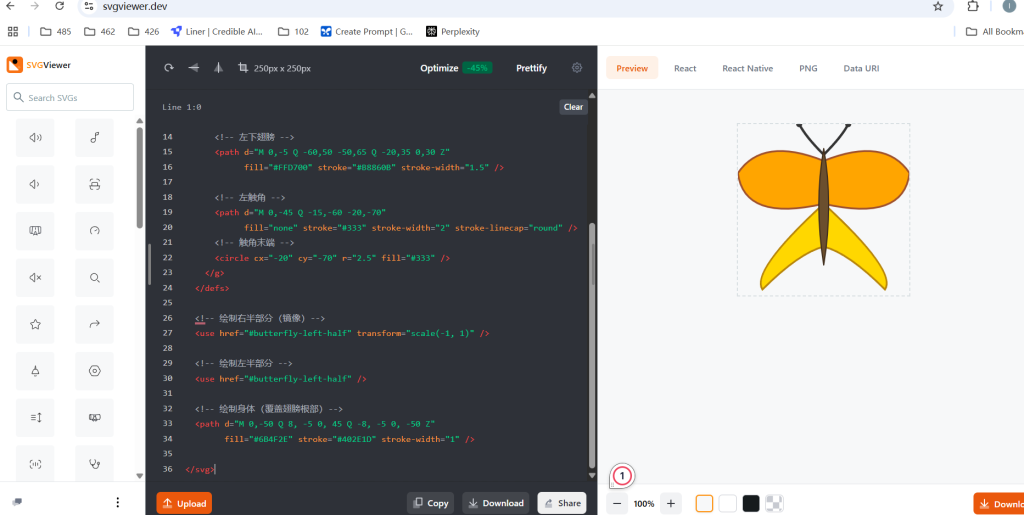
操作过程:向模型发出指令,并将SVG 代码输入在线工具中来查看。
操作结果:测试通过,利用svg语法生成蝴蝶。
测试结果:通过。
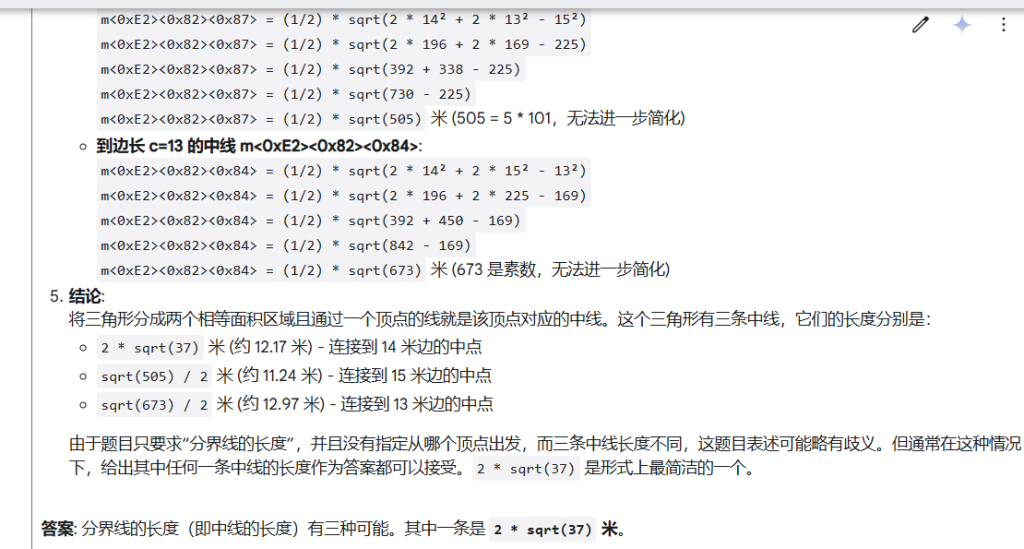
测试结果:通过。
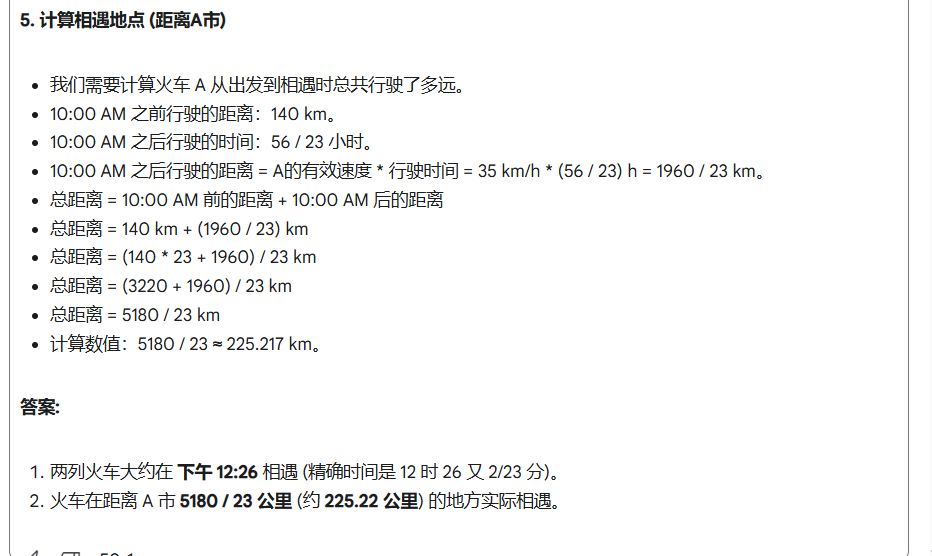
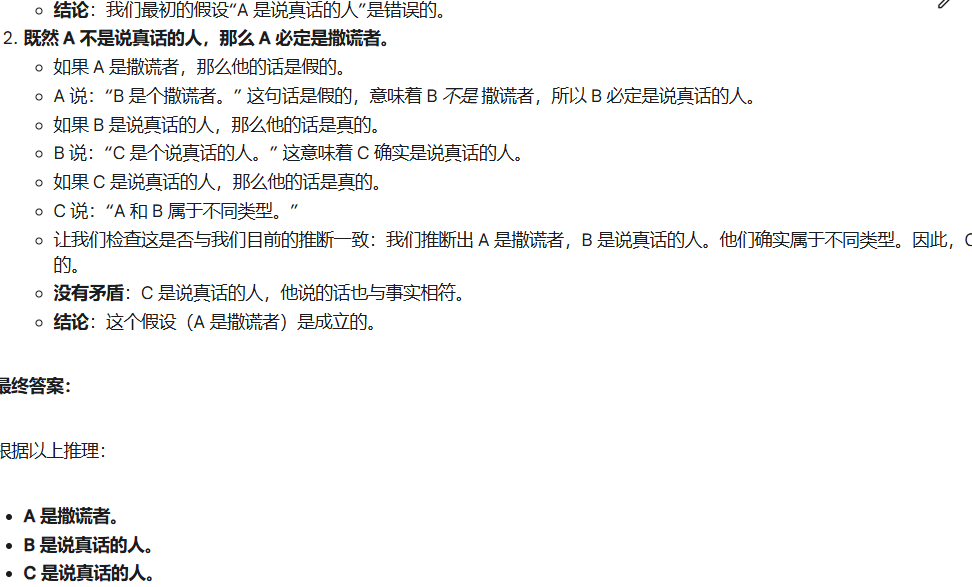
模型进行了这几个步骤:分析初始阶段 (8:00 AM – 9:00 AM)——分析第二阶段 (9:00 AM – 10:00 AM)——分析第三阶段 (10:00 AM 之后)——计算相遇时间——计算相遇地点 (距离A市)
测试结果:通过

测试结果:通过
测试结果:
操作过程:使用OpenRouter同时选择这两个模型并提问测试八的问题
操作结果:内容一致,Gemini2.5速度更快。
git clone https://github.com/openai/openai-agents-python.git
cd openai-agents-python设置Python环境:
python -m venv env
source env/bin/activate  # Linux/Mac
# 或者在Windows上:
# env\Scripts\activate安装SDK:
pip install openai-agents设置API密钥:
# Linux/Mac
export OPENAI_API_KEY=你的密钥

# Windows
# set OPENAI_API_KEY=你的密钥运行示例:
# 例如,运行hello world示例
cd examples/basic
python hello_world.pyagents_as_tools.py:
deterministic.py:
input_guardrails.py:
llm_as_a_judge.py:
output_guardrails.py:
parallelization.py:
routing.py:
hello_world.py这是最基本的例子,展示了如何创建一个简单的代理并运行它:
Runner.run() 执行代理dynamic_system_prompt.py展示了如何基于上下文动态设置代理的指令:
CustomContext),包含代理的风格agent_lifecycle_example.py 和 lifecycle_example.py这两个文件展示了代理生命周期的监控:
random_number 和 multiply_by_two)区别在于 agent_lifecycle_example.py 使用 AgentHooks 绑定到特定代理,而 lifecycle_example.py 使用 RunHooks 绑定到整个运行过程。
stream_items.py 和 stream_text.py展示了框架的流式输出功能:
stream_items.py 展示如何处理各种流式事件(工具调用、工具输出、消息输出等)stream_text.py 展示如何直接流式输出文本内容计算机控制:通过 ComputerTool 和 AsyncComputer 接口,代理可以直接控制浏览器执行复杂的网页操作任务,这对于自动化网络交互、数据收集和UI测试非常有用。
向量搜索:通过 FileSearchTool,代理可以搜索预先准备的向量数据库,适用于文档检索、知识库问答等场景。
网络搜索:通过 WebSearchTool,代理可以直接搜索互联网获取实时信息,适合需要最新数据的场景。
research_bot
web_search.py
Archon是一个创新的AI元代理系统,其核心理念是通过抓取各种框架的文档,来构建能够使用这些框架的AI代理。作为世界上第一个”Agenteer”(代理工程师),它能够自主构建、改进和优化其他AI代理。
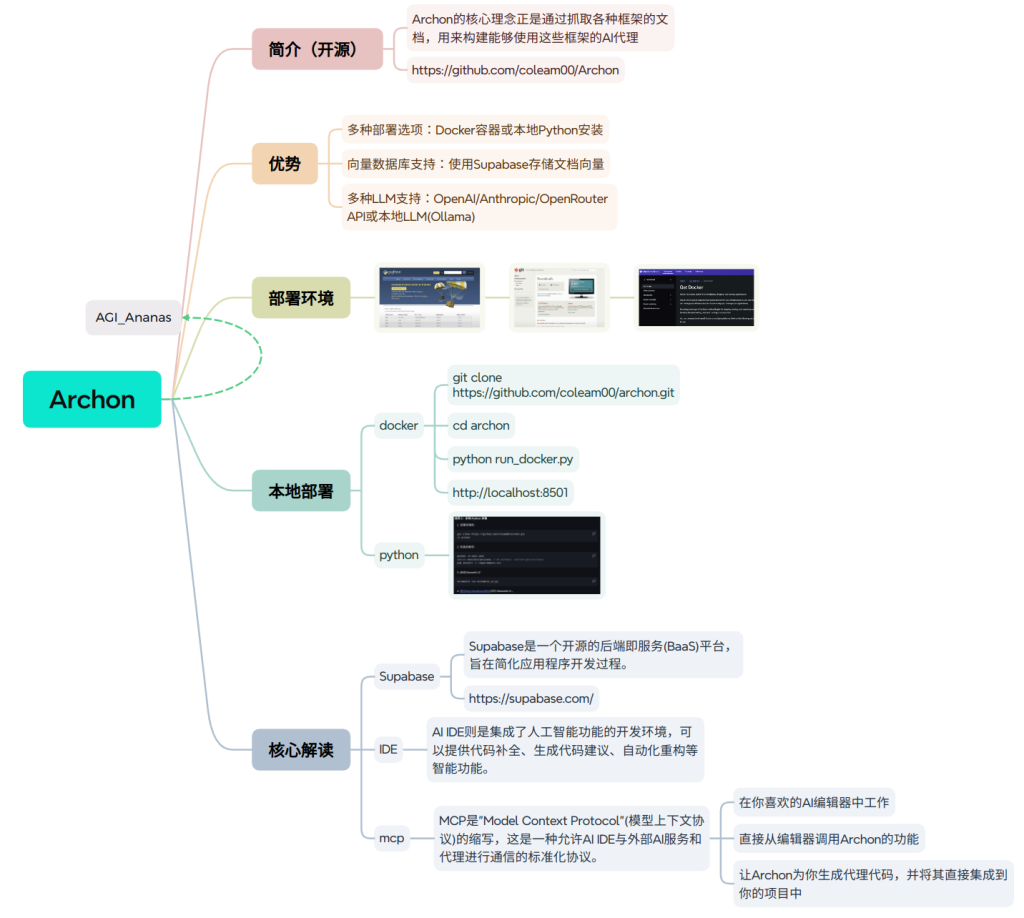
Archon的核心是通过抓取各种框架的文档,用来构建能够使用这些框架的AI代理。
Supabase是一个开源的后端即服务(BaaS)平台,旨在简化应用程序开发过程。在Archon中,它主要用于存储和检索向量化的框架文档,为代理提供知识基础。
git clone https://github.com/coleam00/archon.git
cd archon
python run_docker.py
部署完成后访问 http://localhost:8501
git clone https://github.com/coleam00/archon.git
cd archon
python -m venv venv
source venv/bin/activate  # Windows: venv\Scripts\activate
pip install -r requirements.txt
streamlit run streamlit_ui.pyAI IDE是集成了人工智能功能的开发环境,比如Windsurf、Cursor和Cline,可以提供代码补全、生成代码建议等智能功能。
完成安装后,需要在Streamlit UI配置以下环境:
MCP是”Model Context Protocol”(模型上下文协议),这是一种允许AI IDE与外部AI服务通信的标准化协议。通过MCP配置,可以:
完成所有配置后,可以:
如果配置了MCP,还可以直接在AI IDE中使用Archon的功能,让Archon为你生成代理代码,并将其集成到你的项目中。
Archon通过创新的文档抓取和向量化方法,展示了元学习在AI系统构建中的潜力。它不仅是一个实用的开发工具,也是一个展示智能代理系统演化的教育框架。随着其不断迭代完善,Archon有望成为AI代理开发生态系统的重要组成部分。
Janus-Pro
:adoresever
显存要求:1B 识别图片:6G 生成图片9G
1.创建环境并安装基础依赖
# 创建Python环境(建议3.8以上)
conda create -n janus python=3.8
conda activate janus

# 克隆项目代码
git clone https://github.com/deepseek-ai/Janus.git
cd Janus

# 安装基础依赖
pip install -e .

# 安装Gradio界面依赖(如果需要UI界面)
pip install -e .[gradio]
2.运行Demo(建议修改为1b模型)
# 启动
python demo/app_januspro.py
import gradio as gr
import torch
from transformers import AutoConfig, AutoModelForCausalLM
from janus.models import MultiModalityCausalLM, VLChatProcessor
from janus.utils.io import load_pil_images
from PIL import Image
import numpy as np
import os
# import spaces # Import spaces for ZeroGPU compatibility
# Load model and processor
model_path = "deepseek-ai/Janus-Pro-1B"
config = AutoConfig.from_pretrained(model_path)
language_config = config.language_config
language_config._attn_implementation = 'eager'
vl_gpt = AutoModelForCausalLM.from_pretrained(model_path,
language_config=language_config,
trust_remote_code=True)
if torch.cuda.is_available():
vl_gpt = vl_gpt.to(torch.bfloat16).cuda()
else:
vl_gpt = vl_gpt.to(torch.float16)
vl_chat_processor = VLChatProcessor.from_pretrained(model_path)
tokenizer = vl_chat_processor.tokenizer
cuda_device = 'cuda' if torch.cuda.is_available() else 'cpu'
@torch.inference_mode()
# @spaces.GPU(duration=120)
# Multimodal Understanding function
def multimodal_understanding(image, question, seed, top_p, temperature):
# Clear CUDA cache before generating
torch.cuda.empty_cache()
# set seed
torch.manual_seed(seed)
np.random.seed(seed)
torch.cuda.manual_seed(seed)
conversation = [
{
"role": "<|User|>",
"content": f"<image_placeholder>\n{question}",
"images": [image],
},
{"role": "<|Assistant|>", "content": ""},
]
pil_images = [Image.fromarray(image)]
prepare_inputs = vl_chat_processor(
conversations=conversation, images=pil_images, force_batchify=True
).to(cuda_device, dtype=torch.bfloat16 if torch.cuda.is_available() else torch.float16)
inputs_embeds = vl_gpt.prepare_inputs_embeds(**prepare_inputs)
outputs = vl_gpt.language_model.generate(
inputs_embeds=inputs_embeds,
attention_mask=prepare_inputs.attention_mask,
pad_token_id=tokenizer.eos_token_id,
bos_token_id=tokenizer.bos_token_id,
eos_token_id=tokenizer.eos_token_id,
max_new_tokens=512,
do_sample=False if temperature == 0 else True,
use_cache=True,
temperature=temperature,
top_p=top_p,
)
answer = tokenizer.decode(outputs[0].cpu().tolist(), skip_special_tokens=True)
return answer
def generate(input_ids,
width,
height,
temperature: float = 1,
parallel_size: int = 5,
cfg_weight: float = 5,
image_token_num_per_image: int = 576,
patch_size: int = 16):
# Clear CUDA cache before generating
torch.cuda.empty_cache()
tokens = torch.zeros((parallel_size * 2, len(input_ids)), dtype=torch.int).to(cuda_device)
for i in range(parallel_size * 2):
tokens[i, :] = input_ids
if i % 2 != 0:
tokens[i, 1:-1] = vl_chat_processor.pad_id
inputs_embeds = vl_gpt.language_model.get_input_embeddings()(tokens)
generated_tokens = torch.zeros((parallel_size, image_token_num_per_image), dtype=torch.int).to(cuda_device)
pkv = None
for i in range(image_token_num_per_image):
with torch.no_grad():
outputs = vl_gpt.language_model.model(inputs_embeds=inputs_embeds,
use_cache=True,
past_key_values=pkv)
pkv = outputs.past_key_values
hidden_states = outputs.last_hidden_state
logits = vl_gpt.gen_head(hidden_states[:, -1, :])
logit_cond = logits[0::2, :]
logit_uncond = logits[1::2, :]
logits = logit_uncond + cfg_weight * (logit_cond - logit_uncond)
probs = torch.softmax(logits / temperature, dim=-1)
next_token = torch.multinomial(probs, num_samples=1)
generated_tokens[:, i] = next_token.squeeze(dim=-1)
next_token = torch.cat([next_token.unsqueeze(dim=1), next_token.unsqueeze(dim=1)], dim=1).view(-1)
img_embeds = vl_gpt.prepare_gen_img_embeds(next_token)
inputs_embeds = img_embeds.unsqueeze(dim=1)
patches = vl_gpt.gen_vision_model.decode_code(generated_tokens.to(dtype=torch.int),
shape=[parallel_size, 8, width // patch_size, height // patch_size])
return generated_tokens.to(dtype=torch.int), patches
def unpack(dec, width, height, parallel_size=5):
dec = dec.to(torch.float32).cpu().numpy().transpose(0, 2, 3, 1)
dec = np.clip((dec + 1) / 2 * 255, 0, 255)
visual_img = np.zeros((parallel_size, width, height, 3), dtype=np.uint8)
visual_img[:, :, :] = dec
return visual_img
@torch.inference_mode()
# @spaces.GPU(duration=120) # Specify a duration to avoid timeout
def generate_image(prompt,
seed=None,
guidance=5,
t2i_temperature=1.0):
# Clear CUDA cache and avoid tracking gradients
torch.cuda.empty_cache()
# Set the seed for reproducible results
if seed is not None:
torch.manual_seed(seed)
torch.cuda.manual_seed(seed)
np.random.seed(seed)
width = 384
height = 384
parallel_size = 5
with torch.no_grad():
messages = [{'role': '<|User|>', 'content': prompt},
{'role': '<|Assistant|>', 'content': ''}]
text = vl_chat_processor.apply_sft_template_for_multi_turn_prompts(conversations=messages,
sft_format=vl_chat_processor.sft_format,
system_prompt='')
text = text + vl_chat_processor.image_start_tag
input_ids = torch.LongTensor(tokenizer.encode(text))
output, patches = generate(input_ids,
width // 16 * 16,
height // 16 * 16,
cfg_weight=guidance,
parallel_size=parallel_size,
temperature=t2i_temperature)
images = unpack(patches,
width // 16 * 16,
height // 16 * 16,
parallel_size=parallel_size)
return [Image.fromarray(images[i]).resize((768, 768), Image.LANCZOS) for i in range(parallel_size)]
# Gradio interface
with gr.Blocks() as demo:
gr.Markdown(value="# Multimodal Understanding")
with gr.Row():
image_input = gr.Image()
with gr.Column():
question_input = gr.Textbox(label="Question")
und_seed_input = gr.Number(label="Seed", precision=0, value=42)
top_p = gr.Slider(minimum=0, maximum=1, value=0.95, step=0.05, label="top_p")
temperature = gr.Slider(minimum=0, maximum=1, value=0.1, step=0.05, label="temperature")
understanding_button = gr.Button("Chat")
understanding_output = gr.Textbox(label="Response")
examples_inpainting = gr.Examples(
label="Multimodal Understanding examples",
examples=[
[
"explain this meme",
"images/doge.png",
],
[
"Convert the formula into latex code.",
"images/equation.png",
],
],
inputs=[question_input, image_input],
)
gr.Markdown(value="# Text-to-Image Generation")
with gr.Row():
cfg_weight_input = gr.Slider(minimum=1, maximum=10, value=5, step=0.5, label="CFG Weight")
t2i_temperature = gr.Slider(minimum=0, maximum=1, value=1.0, step=0.05, label="temperature")
prompt_input = gr.Textbox(label="Prompt. (Prompt in more detail can help produce better images!)")
seed_input = gr.Number(label="Seed (Optional)", precision=0, value=12345)
generation_button = gr.Button("Generate Images")
image_output = gr.Gallery(label="Generated Images", columns=2, rows=2, height=900)
examples_t2i = gr.Examples(
label="Text to image generation examples.",
examples=[
"Master shifu racoon wearing drip attire as a street gangster.",
"The face of a beautiful girl",
"Astronaut in a jungle, cold color palette, muted colors, detailed, 8k",
"A glass of red wine on a reflective surface.",
"A cute and adorable baby fox with big brown eyes, autumn leaves in the background enchanting,immortal,fluffy, shiny mane,Petals,fairyism,unreal engine 5 and Octane Render,highly detailed, photorealistic, cinematic, natural colors.",
"The image features an intricately designed eye set against a circular backdrop adorned with ornate swirl patterns that evoke both realism and surrealism. At the center of attention is a strikingly vivid blue iris surrounded by delicate veins radiating outward from the pupil to create depth and intensity. The eyelashes are long and dark, casting subtle shadows on the skin around them which appears smooth yet slightly textured as if aged or weathered over time.\n\nAbove the eye, there's a stone-like structure resembling part of classical architecture, adding layers of mystery and timeless elegance to the composition. This architectural element contrasts sharply but harmoniously with the organic curves surrounding it. Below the eye lies another decorative motif reminiscent of baroque artistry, further enhancing the overall sense of eternity encapsulated within each meticulously crafted detail. \n\nOverall, the atmosphere exudes a mysterious aura intertwined seamlessly with elements suggesting timelessness, achieved through the juxtaposition of realistic textures and surreal artistic flourishes. Each component\u2014from the intricate designs framing the eye to the ancient-looking stone piece above\u2014contributes uniquely towards creating a visually captivating tableau imbued with enigmatic allure.",
],
inputs=prompt_input,
)
understanding_button.click(
multimodal_understanding,
inputs=[image_input, question_input, und_seed_input, top_p, temperature],
outputs=understanding_output
)
generation_button.click(
fn=generate_image,
inputs=[prompt_input, seed_input, cfg_weight_input, t2i_temperature],
outputs=image_output
)
demo.launch(share=True)
# demo.queue(concurrency_count=1, max_size=10).launch(server_name="0.0.0.0", server_port=37906, root_path="/path")